Wednesday, 3 February 2016

Assignment 3

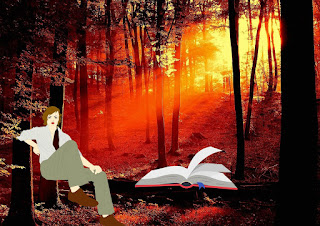
So, this is our last assignment for this trimester. It really great because I learn a lot from this trimester but Madam said I have a problem with my design. But, I will fix the problem and learn more from the book. So for this assignment we need to do a fantasy art. My idea is the palace in the galaxy.

 
For the first one I did Madam said my quality image is very very bad. So madam give a time to re-do.
this the second one that I did. I change the image with a sharp image .
That's all for this trimester . See you soon !

Monday, 18 January 2016

Content Aware

It is a new knowledge for me and very useful. I will show the step how to do it.
Firstly,you choose the image that have a words.
Secondly, choose Rectangle Marquee Tool and draw a box around the words.
Thirdly, click content aware tool and move the box using it .
Here the result we move the words without change the background.
We also can make the words missing without changing the background
click edit and choose fill and then choose content-aware.
Another result using the content-aware technique 

How to do A Quick Mask in Photoshop

Firstly choose the image that you want as the subject and I choose Basketball .
Image result for basketball
Second step click Elliptical Marquee Tool and click to the ball and drag follow the size of the ball
Third step click the quick mask tool which is under the color picker. After click it the red color will appear.
Lastly , we choose Brush tool or you can click Shift+B to brush the the part that haven't fulfill in the second step.
.

Sunday, 17 January 2016

Printing 

Week 9

Image result for printing
For this week is the second last class for the tutorial session. This week, Mdm Ling giving a lecture about printing first before we start our next activity. As we know,Printing is a process for reproducing text and images using a master form or template. Color management accurate and consistent between devices by translating RGB( something about gamut). Color profile stored in the printer information,adobe rgb or pro photo rgb which is special references color profile. Master file is a default layout that follow color profile, colour management convert webpage to SRGB. 
SRGB
-resolution depends on output size
-RAW format
-Sharpen image
-Macintosh darker than windows
-Test print on focus area
I heard something new for me which is Gamut. So, I decide to find out what is Gamut.
In color reproduction, including computer graphics and photography, the gamut, or color gamut  is a certaincomplete subset of colors. The most common usage refers to the subset of colors which can be accurately represented in a given circumstance, such as within a given color space or by a certain output device.
Another sense, less frequently used but not less correct, refers to the complete set of colors found within an image at a given time. In this context, digitizing a photograph, converting a digitized image to a different color space, or outputting it to a given medium using a certain output device generally alters its gamut, in the sense that some of the colors in the original are lost in the process.
I find it at https://en.wikipedia.org/wiki/Gamut
Image result for Gamut

Assignment 2

This week, we need to submit assignment 2 which is Photobook. Photobook is the easiest things to do. BUT, to do with creatively is the hardest things. It took a long time to think it and do it with something different. But, I can't give up this time and I do it. Mdm Ling asked us to do 4 template . Many themes given by Mdm Ling and I choose Graduation.
First template we need to put 1 image
Second template we need to put 4 images
For the 3rd one, we need to put 6 images
The last template we need to do creative expression
I done with my assignment and I hope it can be a creative photobook because I already tried hard to done it .

The use of Vector art into Bitmap Editing

Week 7

  For the week 7, Mdm Nazirah showed us some example of vector graphics. She taught us how to import vector graphics from Illustrator to Photoshop without losing any quality. This thing is a new for us and it is important because we can use it when we do for next assignment which is photobook.
  She asked us to form group of four and go to the lab and do some exercise and using all technique that she taught during the lecture.

we just find all the vector things such as book and human at the freepik.com . In freepik.com, we can download all the vector images that we like and it is free! that is important things. So , I will tell the step how to do this things.

  1. click the images that you like and download it.
  2. open the files using illustrator files.
  3. drag the images to photoshop .
Here the easy step if you want to do . Its done !

Monday, 4 January 2016

Week 6 ( Lecture and Tutorial )

Manipulation of Typography with photos

In this slide I'm gonna show all the steps .

1.   Choose 2 images that you like. I use this 2 images for this time.
  

2.   Insert the first picture into Photoshop as Background layer and duplicate the layer.
3.   Next, add a new layer and filled the layer with white between the background layer and background copy layer.
4.   Then, using the Type tool, type in the desired text. Make sure the arrangement of the layers are as followed.


5.   After typing the words , right click on the image copy and choose Create Clipping Mask. This will make the text is appear outside than the background.
6.    Take the second images that you have choose and put it under layer 1 that we have created.
7.   Done with text manipulation using photoshop J.
Even you already done but you still can edit and choose other font that you love.